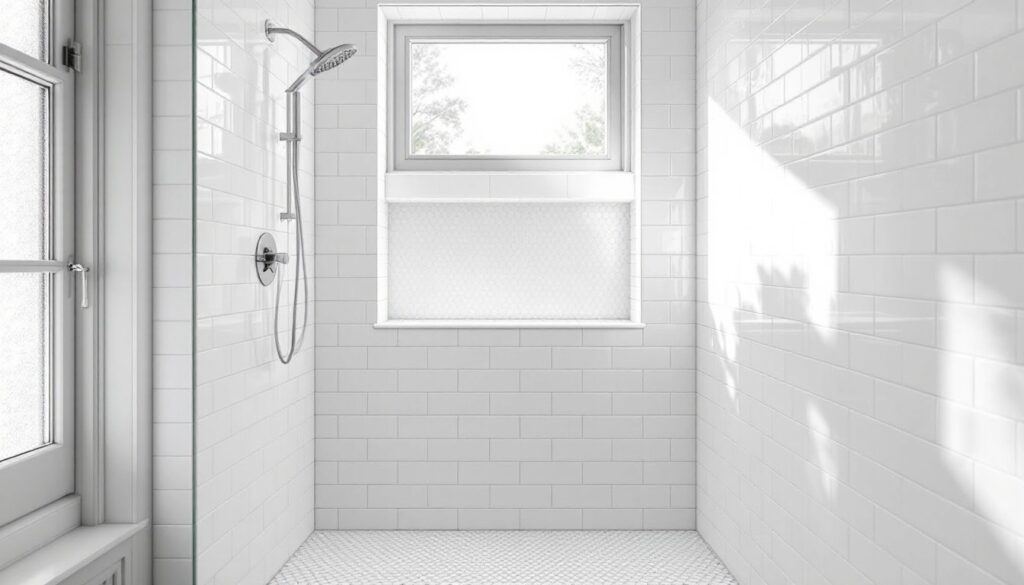
White tile showers never go out of style, and in 2026, they’re more versatile than ever. Whether building a new bathroom or renovating an existing one, white tile offers a clean canvas that works with any design direction, from minimalist modern to classic farmhouse. The key is moving beyond plain grids of identical tiles. By mixing textures, patterns, grout colors, and tile shapes, homeowners can create a custom look without custom pricing. This guide covers proven white tile shower ideas that deliver visual impact, practical durability, and timeless appeal.
Table of Contents
ToggleKey Takeaways
- White tile shower ideas remain timeless because they reflect light, make spaces feel larger, and won’t clash with future design changes or fixture updates.
- Mix textures, patterns, grout colors, and tile shapes to create a custom look without premium pricing—vertical stack or herringbone layouts transform standard subway tiles into modern designs.
- Textured white tiles like 3D geometric patterns, handcrafted options, and stone-look porcelain add depth and character while maintaining the versatility of white tile.
- Grout color is the easiest way to elevate your look: white grout creates a seamless modern feel, while mid-tone gray strikes a balance and charcoal grout makes bold tile patterns pop.
- Proper waterproofing, thin-set mortar coverage, and layout planning are essential for durability—invest in epoxy grout for floors and always seal cement-based grout annually.
Why White Tile Remains the Top Choice for Shower Design
White tile dominates shower design for good reason: it reflects light, making small bathrooms feel larger and darker spaces brighter. Unlike colored or patterned tile, white won’t clash with future fixture changes or paint updates. It’s the most forgiving backdrop for resale value.
From a material standpoint, white ceramic and porcelain tiles are widely available in every price tier. Ceramic tiles typically cost $1–$5 per square foot for basic field tiles, while porcelain ranges from $3–$12 per square foot. Porcelain is denser and less porous, making it ideal for shower floors and wet areas where water exposure is constant. Always check the tile’s PEI rating (Porcelain Enamel Institute scale), look for PEI 3 or higher for wall installations and PEI 4–5 for floors.
White tile also simplifies maintenance. Soap scum and hard water stains show up clearly, which sounds like a drawback but actually makes cleaning easier, you see what needs attention before buildup hardens. Use a pH-neutral cleaner weekly and reseal grout lines annually to keep everything looking fresh.
One practical note: white tile doesn’t mean stark or cold. Texture, pattern, and grout color create warmth and personality without sacrificing the versatility that makes white tile a smart long-term choice.
Classic Subway Tile Patterns with a Modern Twist
Subway tile, the 3″ × 6″ rectangular workhorse, remains a go-to for good reason. It’s affordable, easy to install, and instantly recognizable. But in 2026, straight running bond (horizontal rows with centered seams) feels predictable. Small layout changes deliver a completely different look with the same tile.
Vertical stack (tiles oriented vertically in straight columns) elongates wall height, making standard 8-foot ceilings feel taller. It’s a clean, modern alternative to traditional horizontal runs. Herringbone creates movement and visual interest, expect to add 15–20% to your tile order for cuts and waste. Use a wet saw with a diamond blade for clean angled cuts: a basic tabletop model rents for about $40–$60 per day.
Offset (running bond) is traditional but timeless. For a subtle twist, try a 1/3 offset instead of the standard 1/2 offset, it’s less predictable without being busy. Stacked grid (straight vertical and horizontal lines) works well in modern or industrial bathrooms.
When installing subway tile, always use tile spacers, 1/16″ for a tight modern look, 1/8″ for more traditional spacing. Mix thin-set mortar to a peanut butter consistency and back-butter each tile for full coverage, especially on walls. This prevents hollow spots that can crack under impact.
For large white tile shower ideas, consider 4″ × 12″ or 6″ × 12″ planks in the same layout patterns. Larger formats mean fewer grout lines and faster installation, and they create a sleeker, more contemporary feel.
Textured White Tiles for Added Dimension
Flat white tile can feel sterile. Texture adds depth, hides minor imperfections, and introduces a tactile element that makes showers feel custom. Several textures work well in wet environments.
3D geometric tiles, hexagons, diamonds, or wave patterns, create shadow lines that shift with lighting throughout the day. These work best as accent walls or from the showerhead wall down to waist height. Installing them across all walls can overwhelm a small space.
Handmade or artisan tiles with slight surface irregularities bring warmth and character. Look for tiles labeled “handcrafted” or “zellige-style.” Expect color and size variation, this is intentional. These tiles typically cost $8–$20 per square foot. Installation takes longer because sizing inconsistencies require frequent adjustments.
Matte finishes on white tile reduce glare and hide water spots better than glossy surfaces. They feel softer and more modern. Glossy finishes reflect more light and make tight spaces feel more open, but they show every fingerprint and water droplet during cleaning.
Pebble or stone-look porcelain adds organic texture without the maintenance headaches of natural stone. Modern porcelain can mimic Carrara marble, limestone, or concrete with UV-stable inkjet printing. These tiles often come in large formats (12″ × 24″ or larger), which minimizes grout lines.
When working with textured tile, pay extra attention to thin-set coverage. Use a 1/4″ × 3/8″ square-notch trowel for most wall tiles and back-butter any tiles with deep texture. According to interior design experts, textured white tiles are gaining popularity in luxury remodels for their ability to add character without color.
Mixing White Tile Shapes and Sizes
Combining different tile shapes in the same shower creates visual interest without introducing color. The key is maintaining a consistent color temperature (cool white vs. warm white) and finish (all matte or all glossy) so the mix feels intentional, not random.
Hexagon and subway combinations are popular: install hexagons on the floor and lower walls, then transition to subway tile at waist height. This grounds the space visually and makes cleaning easier, hexagons with their many grout lines are harder to scrub.
Large format walls with mosaic accents offer a sleek, modern look. Use 12″ × 24″ or larger tiles on main walls, then add a vertical stripe of 1″ × 1″ or 2″ × 2″ mosaic as a focal point. This works especially well in niches or behind freestanding tubs.
Penny rounds (small circular tiles) on floors paired with rectangular wall tiles create a classic, almost retro feel that’s trending again in 2026. Penny rounds provide excellent slip resistance due to all the grout lines, critical for shower floors. Use epoxy grout on floors: it resists staining and mildew better than standard cement grout.
When mixing tiles, plan your layout on graph paper first. Mark plumbing fixture locations, niches, and benches. Start your layout from the most visible wall (usually the wall you see when entering the bathroom) and work outward. This ensures any cut tiles end up in corners or less noticeable areas.
Material prep matters: let tiles acclimate to the room temperature for 24 hours before installation. This prevents expansion or contraction issues, especially with larger format tiles. Many design enthusiasts turn to curated remodel galleries to visualize how different tile combinations work together before committing to a layout.
Grout Color Choices That Elevate White Tile
Grout color is the single easiest way to transform white tile. It’s also the most overlooked decision. Standard white grout blends in, creating a seamless look. Contrasting grout turns the tile pattern into the focal point.
White or light gray grout keeps the look clean and minimal. It enlarges the visual field, making small showers feel more open. Use epoxy grout for shower floors and walls, it costs about twice as much as cement grout but won’t stain, crack, or need sealing. Mix epoxy carefully: it sets fast and cleanup requires specific solvents.
Charcoal or black grout creates bold grid lines that highlight tile shape and pattern. This works especially well with subway tile in herringbone or vertical layouts. Be warned: dark grout shows soap scum and hard water deposits as white streaks. It’s stunning but higher maintenance.
Mid-tone gray grout (think “pewter” or “smoke”) strikes a balance. It defines the tile pattern without overpowering it and hides minor discoloration better than pure white. This is the most forgiving choice for busy households.
Grout line width affects the overall look. 1/16″ grout lines create a nearly seamless appearance, popular in modern and minimalist designs. 1/8″ lines are standard and easier for DIY installation. 1/4″ or wider emphasizes the grout as a design element, only use this with contrasting grout colors.
Always seal cement-based grout 72 hours after installation, then annually. Use a penetrating sealer, not a surface coating. Apply with a foam brush or small roller, wipe excess immediately, and allow 24 hours to cure before exposing to water.
Accent Wall and Niche Design Ideas
An accent wall focuses attention and breaks up monotony without overwhelming a small space. In showers, the showerhead wall is the natural focal point, it’s the first thing you see when entering and the backdrop during use.
Floor-to-ceiling feature tiles work well here. Consider a different tile shape (hexagons, arabesque, fish scale) or texture (3D relief, handmade) in the same white family. Keep the other three walls simple to avoid visual clutter.
Horizontal bands of contrasting tile at eye level create visual interest. Install a 12″–18″ band of mosaic or textured tile around the perimeter at roughly 5–6 feet high. This draws the eye upward and makes ceilings feel taller.
Shower niches are both functional and decorative. Frame them with a contrasting tile, if your walls are subway tile, line the niche interior with small-scale mosaic or hexagons. Install niches between studs (typically 14.5″ wide for 16″ on-center framing) and waterproof thoroughly with a liquid membrane or sheet membrane system like Schluter-KERDI before tiling.
For large white tile shower ideas, consider an entire wall of 24″ × 48″ or even 36″ × 36″ slabs. These porcelain slabs mimic natural stone and require minimal grout. They’re heavy, over 30 pounds per piece, so you’ll need a helper and a large-format tile mortar with stronger adhesion.
Niche shelves should slope slightly toward the shower (about 1/8″ per foot) for drainage. Popular design shows on home improvement networks frequently feature built-in niches as a key detail in high-end shower renovations. Don’t skip the pan liner or waterproofing membrane behind and around niches, this is where most shower leaks originate.
Conclusion
White tile showers offer endless design flexibility without sacrificing timeless appeal. By varying tile shape, texture, layout pattern, and grout color, homeowners can create a custom look on a standard budget. Focus on quality waterproofing, proper thin-set coverage, and thoughtful layout planning. Most of these ideas are well within reach for confident DIYers with basic tile experience, a wet saw, and a weekend. The result: a shower that feels fresh in 2026 and still looks sharp a decade from now.