A backyard isn’t just leftover space behind the house, it’s untapped potential waiting for the right design approach. Whether dealing with a compact city lot or sprawling suburban acreage, smart landscaping transforms outdoor areas into functional living zones that add genuine value to a property. The best designs balance aesthetics with practicality, incorporating elements that homeowners will actually use rather than just admire from the kitchen window. This guide walks through proven landscape strategies that work for various budgets, skill levels, and yard configurations.
Table of Contents
ToggleKey Takeaways
- Smart landscape backyard design balances aesthetics with functionality by dividing spaces into distinct zones for dining, lounging, play, and gardening that maximize usability and flow.
- Professional planting uses a three-layer strategy—canopy trees (15+ feet), mid-level shrubs (4-15 feet), and ground-level perennials—to create depth, visual interest, and year-round appeal in your landscape backyard design.
- Low-maintenance hardscaping options like gravel patios ($3-5 per sq ft), flagstone ($15-25 per sq ft), and stamped concrete ($6-12 per sq ft) deliver permanent structure and reduce ongoing maintenance costs.
- Budget-friendly DIY projects such as mulch bed expansion, stacked concrete block fire pits, and raised garden beds deliver high-impact results for under $200-300 without contractor markups.
- Water features, focal points, and strategic lighting extend your backyard’s usable hours while adding ambiance, safety, and visual interest through uplighting, path lighting, and recirculating fountains.
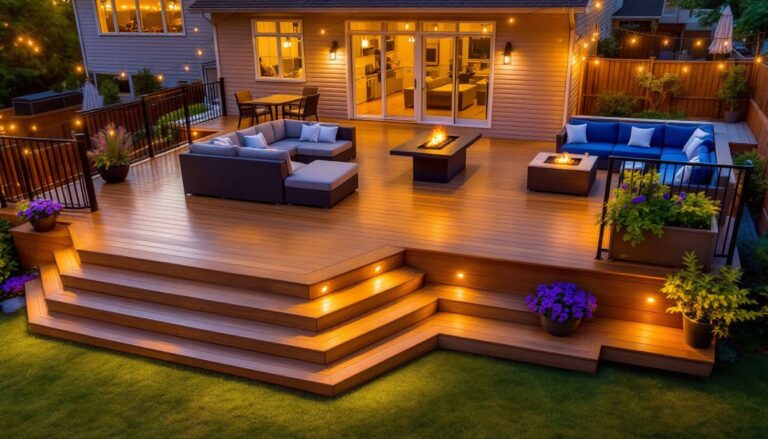
Create Functional Zones for Outdoor Living
Dividing a backyard into distinct zones makes the space feel larger and more purposeful. Rather than treating the entire yard as one undifferentiated lawn, defining separate areas for dining, lounging, play, or gardening creates natural flow and maximizes usability.
Start by mapping out high-traffic paths and sight lines from the house. Place active zones (fire pits, play areas) farther from windows where noise matters, and position quiet spots (reading nooks, meditation gardens) in shaded corners. Use changes in elevation, low hedges, ornamental grasses, or even gravel borders to mark transitions between zones without building actual walls.
For sloped yards, terracing with retaining walls (typically 4-8 inches of compacted base plus wall blocks) creates usable flat zones while preventing erosion. Always check local building codes, walls over 4 feet tall usually require engineering plans and permits.
Outdoor Dining and Entertainment Areas
A dedicated dining zone needs solid, level hardscaping. Concrete pavers (12×12 or 16×16 inches) over a 4-6 inch compacted gravel base provide stability without the cracking issues of poured slabs. Allow 48 inches clearance around tables so chairs can pull out comfortably.
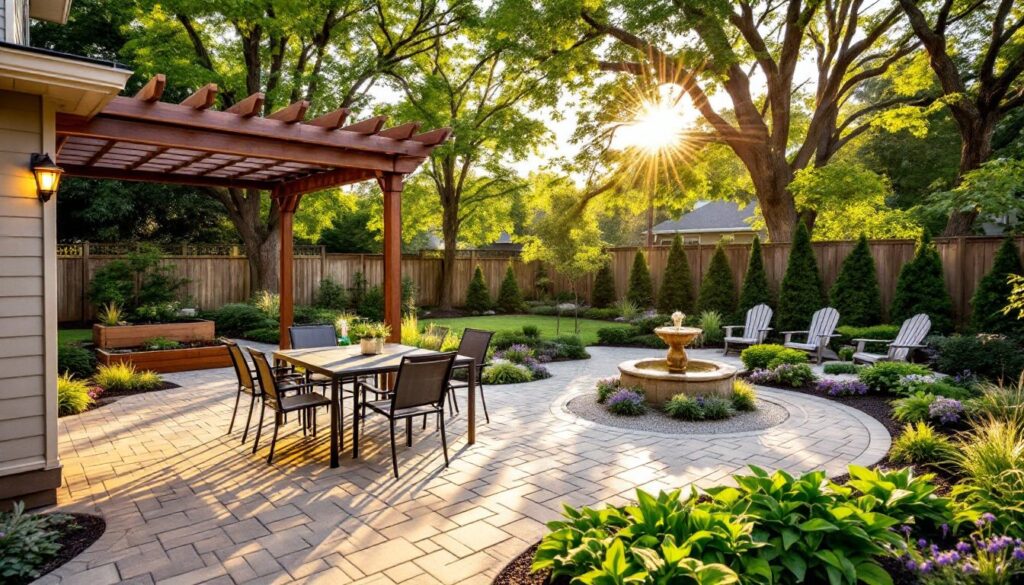
Many homeowners find that outdoor entertaining areas perform better with partial overhead coverage, pergolas with 2×6 or 2×8 rafters spaced 12-16 inches apart provide sun relief without total shade. Run electrical conduit during initial hardscape installation if planning to add lights, speakers, or outlets later. Permit requirements vary, but most jurisdictions require GFCI protection for outdoor receptacles.
For cooking zones, position grills or outdoor kitchens at least 10 feet from structures and overhanging branches per fire safety standards. A simple L-shaped counter (concrete block base with mortared stone or tile surface) provides prep space without the cost of a full outdoor kitchen.
Layer Your Landscape with Plants and Greenery
Professional landscapes use a three-layer planting strategy: canopy trees (15+ feet), mid-level shrubs and ornamental trees (4-15 feet), and ground-level perennials and groundcovers. This creates depth and visual interest from multiple viewing angles.
Start with canopy trees placed strategically for shade, on the south or west side to cool the house in summer. Choose species rated for the USDA hardiness zone (check the zip code at USDA’s plant hardiness map for accuracy). Allow 15-20 feet from foundations to prevent root and branch conflicts with structures.
Mid-layer shrubs define zone edges and add seasonal color. Evergreens (boxwood, holly, juniper) provide year-round structure, while deciduous shrubs (hydrangea, spirea, ninebark) deliver flowers and fall color. Space according to mature width, most nursery tags underestimate spread, so plan for 1.5x the listed width.
Ground-layer plants fill gaps and suppress weeds. Perennials like daylilies, coneflowers, and hostas return each year without replanting. Mulch beds with 2-3 inches of shredded hardwood or pine bark to retain moisture and regulate soil temperature, avoid volcano-mulching around tree trunks, which invites rot.
For edible landscaping, fruit trees (dwarf varieties stay under 10 feet), berry bushes, and raised herb beds integrate food production without sacrificing aesthetics. Most fruiting plants need 6-8 hours of direct sun, so site them accordingly.
Low-Maintenance Hardscaping Ideas That Make an Impact
Hardscaping reduces mowing, watering, and maintenance while adding permanent structure. The key is choosing materials that match the home’s style and local climate.
Gravel patios and paths are the budget-friendly hardscape choice. Use ¾-inch crushed stone (not pea gravel, which migrates) over landscape fabric and a 2-4 inch compacted base. Edge with steel, aluminum, or pressure-treated 4×4 timbers to contain the stone. Installation is straightforward, excavate 4-6 inches, compact the base, lay fabric, spread stone, and tamp again. Total cost runs $3-5 per square foot depending on region and stone type. Designers increasingly favor gravel for modern backyard designs due to excellent drainage and contemporary aesthetics.
Flagstone or slate patios deliver a natural look. Dry-laid (sand-set) installations are DIY-friendly: excavate, add 4 inches compacted base, 1 inch leveling sand, then fit stones with ½-inch joints filled with polymeric sand. Wet-laid (mortared onto concrete) requires more skill but prevents shifting. Expect $15-25 per square foot for materials.
Poured concrete remains cost-effective for large areas ($6-12 per square foot), but consider stamped or stained finishes to avoid the boring gray slab look. Concrete requires control joints every 8-10 feet to manage cracking. DIY pours demand speed and muscle, recruit help or hire out.
Deck platforms work well for uneven terrain. Pressure-treated framing (2×8 or 2×10 joists 16 inches on-center) with composite or cedar decking avoids the rot and splinter issues of old-school wood. Most jurisdictions require permits for decks over 30 inches high or attached to structures. Consult IRC guidelines for joist spans and railing requirements.
Add Water Features and Focal Points
Water features add sound, movement, and wildlife appeal. The scale should match the yard, a 6-foot pond overwhelms a small patio, while a tabletop fountain disappears in a sprawling garden.
Recirculating fountains (bubbler rocks, urn fountains, tiered basins) run on small pumps (50-200 GPH) and require only a GFCI outlet. Dig a reservoir basin, install a submersible pump, stack decorative elements, and fill with water. Most kits cost $150-500 and install in an afternoon. Refill weekly during hot weather to offset evaporation.
Pondless waterfalls deliver the sight and sound of moving water without the maintenance headaches of a full pond. Build a gravel-filled reservoir basin (lined with EPDM rubber or preformed basin), stack natural stone for the waterfall structure, and run the pump line up through the rocks. Expect to move serious weight, a 2-3 foot waterfall uses 200-500 pounds of stone. This is a weekend project for two people with basic DIY skills.
For formal ponds, flexible EPDM liner (45 mil thickness) shapes to any design. Excavate with shelves at 12 and 18 inches deep for plant zones, sloping to 24+ inches in the center for fish overwintering. Install underlayment fabric before the liner to prevent punctures. Edge with flagstone or stacked rock. Adding a biological filter and UV clarifier keeps water clear if stocking fish.
Non-water focal points work too: a well-placed boulder (1-3 tons), a sculptural specimen tree (Japanese maple, weeping cherry, contorted filbert), or even a simple steel obelisk draws the eye and provides visual anchors.
Lighting Design for Ambiance and Safety
Outdoor lighting extends usable hours and improves safety, but poor design creates glare and light pollution. The goal is to light the subject (path, tree, seating area), not the bulb itself.
Low-voltage systems (12V) are safer and more DIY-friendly than 120V line voltage. A typical setup includes a transformer (150-300 watt capacity), cable (12 or 14 gauge), and fixtures. Run cable in shallow trenches (6 inches deep is code-minimum in most areas, though burying deeper protects against accidental shovel strikes). Connect fixtures with waterproof wire connectors, not wire nuts.
Use warm white LEDs (2700-3000K) for inviting ambiance, cool white or daylight temps feel harsh in residential landscapes. LED fixtures draw 3-7 watts versus 20+ for halogens, reducing transformer load and energy costs.
Path lighting should illuminate the walking surface without glare in the eyes, fixtures 18-24 inches tall with downward shields work best. Space them 8-10 feet apart along walkways.
Uplighting showcases trees and architectural elements. Position fixtures at the base, aimed upward, adjusting the angle to highlight trunk texture or canopy shape. One or two well-lit specimen trees create more impact than a dozen poorly lit shrubs.
Task lighting for dining or cooking zones needs brighter output, look for fixtures rated 200-400 lumens. Mount overhead or on adjacent structures to avoid shadowing work surfaces.
Always use GFCI protection on transformers and outdoor outlets per NEC requirements. If running 120V line voltage for stronger fixtures or pool lighting, pull permits and consider hiring a licensed electrician, mistakes with line voltage are dangerous and void insurance.
Budget-Friendly DIY Backyard Landscaping Projects
High-impact landscaping doesn’t require unlimited budgets. Strategic DIY projects deliver results without the contractor markup.
Mulch bed expansion is the fastest visual upgrade. Define crisp edges with a flat spade or half-moon edger, remove grass, spread 2-3 inches of mulch, and group perennials or shrubs in odd-numbered clusters (3, 5, or 7 plants). A cubic yard of mulch ($30-50) covers roughly 100 square feet at 3-inch depth. This project takes a weekend and costs under $200 for most yards.
DIY fire pits create gathering spots cheaply. The simplest design stacks retro-fit concrete blocks (4×8×16 inches, often called wall blocks) in a 36-48 inch diameter circle, three to four courses high. No mortar needed, use construction adhesive between courses for stability. Excavate 4 inches, add pea gravel for drainage, and line the interior with fire-rated brick if burning wood regularly. Total cost: $100-200. Check local ordinances for setback requirements and burn restrictions.
Pallet projects turn free or cheap materials into planters, vertical gardens, or outdoor furniture. Disassemble pallets carefully (wear gloves, nails and splinters are guaranteed), cut to size, sand, and seal with exterior stain or paint. A vertical pallet planter (stand it upright, attach landscape fabric to the back, fill pockets with soil, and plant herbs or succulents) costs under $30 and installs in an afternoon.
Raised garden beds built from 2×10 or 2×12 untreated cedar or composite boards create instant growing space. A 4×8 bed (standard lumber lengths) uses eight boards plus corner brackets or screwed joints. Line the bottom with hardware cloth to exclude burrowing pests, fill with a blend of topsoil and compost, and plant. Material cost: $80-150 depending on lumber choice.
For those working with limited square footage, vertical elements like trellises or wall-mounted planters maximize planting area without consuming valuable floor space.
Staining or painting existing surfaces transforms tired wood fences, decks, or concrete patios. Power-wash first (1500-2000 PSI for wood, up to 3000 PSI for concrete), let dry 48 hours, then apply stain or masonry paint with a roller or pump sprayer. A gallon of solid stain covers 150-200 square feet depending on surface texture. This project costs $50-150 for an average fence or patio and delivers dramatic results.
Many homeowners discover that thoughtful budget-friendly design choices compete with expensive installations when executed well. The difference comes down to careful planning, clean execution, and choosing projects that align with skill level.
Finally, a well-designed landscape reflects Southern outdoor living traditions that prioritize comfortable, inviting spaces over magazine-perfect but unusable showpieces. The best backyards get used, for weeknight dinners, weekend projects, or simply watching the seasons change from a comfortable chair.