
An open deck is great until the mosquitos show up, the temperature drops, or an unexpected storm rolls in. Enclosing that space doesn’t mean sacrificing the outdoor feel, it means extending how many months you actually use it. Whether the goal is blocking bugs while keeping the breeze, adding glass for winter views, or going the budget route with screens and salvaged materials, there’s an enclosure approach that fits the skill level and wallet. This guide walks through practical options, from fully screened-in porches to three-season rooms, with real material choices and installation notes to help turn an underused deck into a year-round hangout.
Table of Contents
ToggleKey Takeaways
- Enclosed deck ideas range from simple screen enclosures ($1,200–$3,000) to glass systems ($8,000–$25,000+), with budget-friendly options using salvaged materials costing $500–$1,500.
- Screen enclosures preserve airflow and block insects in mild climates, while glass-enclosed decks create true four-season rooms with superior insulation and unobstructed views.
- Three-season rooms with removable or interchangeable panels offer flexible year-round use without the full cost of glass enclosures, making them ideal for homeowners seeking balance.
- Load-bearing capacity matters for glass installations—a 10×10-foot glass wall can weigh 600–800 pounds, requiring verification that existing joists and ledger boards can handle the added weight.
- Furnish enclosed decks with moisture-resistant outdoor-grade materials, add GFCI-protected lighting and ventilation, and consider heating options like ductless mini-split systems ($2,000–$4,000) for true year-round comfort.
- Salvaged windows, exterior plywood sheathing, and clear vinyl are practical budget-stretching materials that transform underused open decks into flexible spaces for workshops, dining, or play zones.
Why Enclose Your Deck?
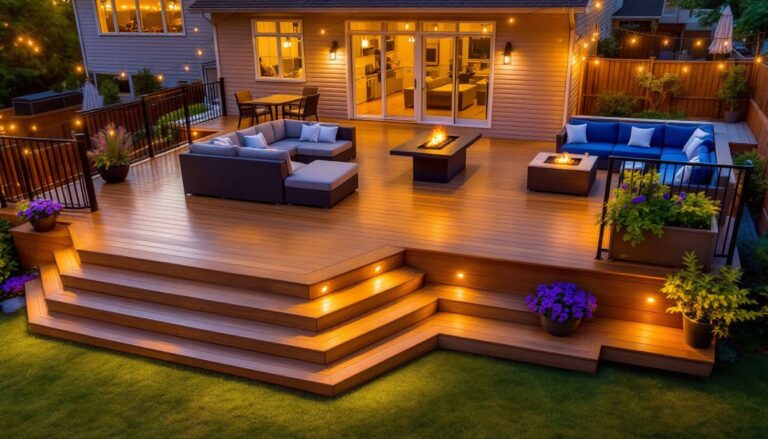
Enclosing a deck extends its usability well beyond summer weekends. In many climates, an open deck sits unused for six to eight months a year due to cold, rain, or insects. An enclosure creates a buffer zone that moderates temperature, blocks wind, and keeps pests out without the full commitment (or cost) of a traditional home addition.
There’s also the resale angle. A well-executed enclosed deck can add functional square footage that appraisers recognize, especially if it’s wired for lighting and includes climate control. That said, it’s not automatic value, shoddy DIY work or unpermitted structural changes can actually hurt resale.
From a practical standpoint, enclosures protect outdoor furniture and finishes from UV degradation and moisture. They also create flexible space: a workshop in winter, a screened dining area in summer, or a play zone that doesn’t track mud into the house. The key is matching the enclosure type to how the space will actually be used, not just what looks good in photos.
Screen Enclosures for Maximum Airflow
Screen enclosures are the simplest way to keep bugs out while preserving cross-ventilation. They’re ideal for climates with mild winters or homeowners who primarily want warm-weather protection. Most screen systems use aluminum or vinyl framing with fiberglass or aluminum mesh. Fiberglass is cheaper and easier to re-screen if torn: aluminum mesh resists sagging and pet damage better.
For a DIY approach, pre-fabricated screen panels from big-box stores mount directly to existing deck posts. These snap-together kits typically run $8–$15 per linear foot of wall, not including the door. If the deck has standard 4×4 or 6×6 posts on 6- to 8-foot centers, installation is straightforward: screw the track to the posts, slide in the panels, and add a screen door.
One common mistake: not accounting for screen sag over time. Tension matters. Many professionals stretch fiberglass screen with a spline roller and trim the excess, ensuring it’s taut before securing. For larger spans (over 8 feet), consider adding a mid-rail to reduce flex.
Permits are rarely required for non-structural screen additions, but always verify locally. Some HOAs have restrictions on screen color or framing style. Budget about $1,200–$3,000 for a typical 12×16-foot deck using pre-fab panels, or $3,500–$7,000 if hiring a contractor to custom-build the frame and screen it in.
Glass-Enclosed Decks for Panoramic Views
Glass enclosures turn a deck into a true four-season room. Tempered or laminated glass panels provide unobstructed sightlines and superior insulation compared to screens. Systems range from fixed-pane installations to sliding or folding glass walls that open completely in good weather.
The two main approaches are site-built glass walls framed with wood or aluminum, or engineered glass panel systems like those from manufacturers such as NanaWall or LaCantina. Site-built is cheaper upfront but demands careful flashing and waterproofing, improper sealing leads to condensation, rot, and air leaks. Engineered systems cost more ($200–$400 per linear foot installed) but include integrated weatherstripping, drainage channels, and tested thermal breaks.
Glass weight is a critical consideration. Tempered panels typically weigh 6–8 pounds per square foot for 1/4-inch thickness. A 10×10-foot wall can add 600–800 pounds, which may exceed the original deck’s load rating. Always verify that joists and ledger boards are rated for the added dead load. Many advanced construction techniques emphasize proper load transfer in enclosure retrofits.
For insulation, look for low-E coatings and insulated (dual-pane) glass with an air gap. Single-pane tempered glass has an R-value around 0.9: insulated glass bumps that to R-2 to R-3, reducing heat loss and condensation. If the plan includes heating the space, adding glass without upgrading insulation in the floor and ceiling is throwing money away.
Permits are almost always required for glass enclosures, especially if adding electrical or HVAC. Expect to pull a building permit and possibly electrical and mechanical permits. Budget $8,000–$25,000+ depending on size, glass type, and whether the project includes heating or cooling.
Three-Season Rooms with Removable Panels
Three-season rooms split the difference between screens and glass by using removable or interchangeable panels. The concept: install a frame system that accepts both screen panels in summer and clear vinyl, polycarbonate, or glass inserts in cooler months.
One popular DIY-friendly option is Eze-Breeze or similar vinyl window systems. These vertical four-track sliding panels use flexible vinyl panes that block wind and rain but aren’t as thermally efficient as true insulated glass. They’re popular in the Mid-Atlantic and Southeast where winters are short. Panels slide open for ventilation and can be removed entirely and stored. Expect to pay $30–$50 per square foot installed.
For a more robust system, build a stud-framed wall with window rough openings sized to accept standard vinyl or aluminum windows in the off-season and removable screen inserts during summer. This requires more carpentry but allows for better insulation and the option to add drywall or tongue-and-groove paneling on the interior.
When framing, use pressure-treated 2×4 lumber for the sill plate in contact with the deck, and standard framing lumber above. Anchor the sill with galvanized structural screws or bolts into the deck joists, not just the decking itself. Spacing studs at 16 inches on center provides solid nailing for interior finishes and window flanges.
Be mindful of thermal bridging. Wood studs conduct heat, so if planning to heat the space, consider adding rigid foam insulation on the exterior before siding, or use advanced framing techniques (24-inch centers with insulated sheathing). Many outdoor entertaining spaces benefit from the flexibility of swappable panels without the expense of a full four-season room.
Budget-Friendly DIY Enclosure Options
Enclosing a deck doesn’t require a five-figure budget. With salvaged materials, basic carpentry skills, and a clear plan, it’s possible to create a functional enclosure for $500–$1,500 on a typical 12×14-foot deck.
Salvaged windows are the budget builder’s best friend. Check Habitat for Humanity ReStores, Craigslist, or local demolition auctions for vinyl or wood windows. Mismatched sizes add character, and imperfect seals are fine for a three-season space. Build a simple 2×4 stud frame to fit the windows you find, rather than the other way around. This approach turns limitations into design features.
For walls that don’t need windows, use exterior-grade plywood or OSB sheathing with a coat of exterior primer and paint. A 4×8 sheet of 7/16-inch OSB runs $12–$18, and a gallon of exterior primer covers about 400 square feet. Add vertical 1×3 battens over the seams for a board-and-batten look that hides imperfections and adds visual interest.
Clear vinyl sheeting (6–10 mil) is another low-cost option for windbreaks. Staple it to a wood frame or use grommets and zip ties for a removable setup. It’s not pretty, but it blocks 80–90% of wind and rain for under $100 in materials. This works well for small backyard ideas where the enclosure is seasonal.
For flooring, if the existing deck boards are weathered, a coat of solid-body stain refreshes the look for $30–$50 per gallon. Each gallon covers roughly 150–200 square feet on rough wood. Alternatively, lay down outdoor carpet or interlocking deck tiles for added warmth underfoot without the cost of new decking.
Safety note: Always wear safety glasses and gloves when handling salvaged materials. Old windows may have broken seals, lead paint, or sharp edges. Test any questionable paint with a lead test kit (about $10 at hardware stores) and encapsulate or dispose of materials properly if positive.
Many DIYers reference free plans from sites like Ana White for framing details and cut lists, adapting them to fit salvaged window dimensions.
Decorating and Furnishing Your Enclosed Deck
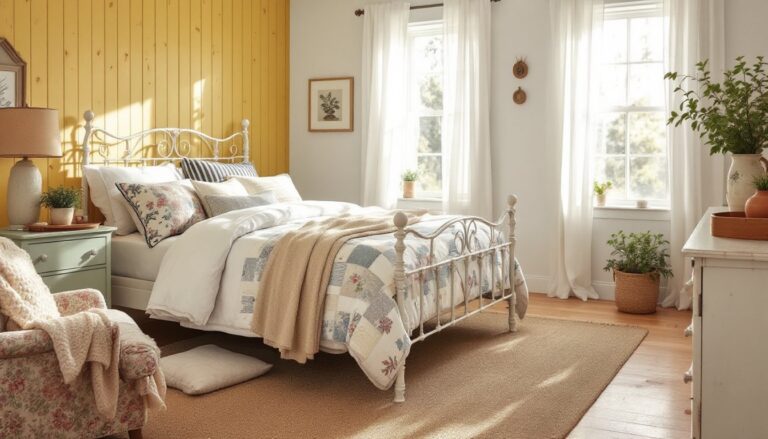
Once the enclosure is up, furnishing transforms the space from construction zone to usable room. Because most enclosed decks aren’t fully climate-controlled, choose materials that handle humidity swings and temperature shifts.
Furniture should be lightweight enough to rearrange but durable enough to handle moisture. Resin wicker, powder-coated aluminum, and treated wood all work well. Avoid upholstered pieces unless using outdoor-grade fabric (solution-dyed acrylic like Sunbrella) that resists mold and fading. Indoor furniture will deteriorate quickly even in a three-season space.
For flooring comfort, add indoor/outdoor rugs. Polypropylene rugs dry fast, resist staining, and cost $50–$200 for an 8×10. They also help define zones, a dining area, lounge corner, or play space, without permanent changes.
Lighting is critical. If the enclosure isn’t wired, battery-operated LED puck lights or solar string lights provide ambiance. For a permanent solution, run 14/2 NM-B cable (Romex) from an existing circuit to a junction box, then install overhead fixtures or wall sconces. Most codes require GFCI protection for receptacles in damp or wet locations, even if the space is technically enclosed. Hire a licensed electrician if unfamiliar with residential wiring: improperly installed electrical is a fire and shock hazard.
Heating options for cooler months include portable propane heaters (properly vented), electric radiant panels, or a ductless mini-split heat pump if the budget allows. A mini-split provides both heating and cooling and runs about $2,000–$4,000 installed for a single-zone system. Portable electric space heaters work but are inefficient and require dedicated circuits to avoid tripping breakers.
Ceiling fans improve air circulation in warmer months. A standard 52-inch fan moves about 5,000 CFM and helps with both cooling and keeping insects at bay. Mount to a joist or add blocking between joists for solid support. Fans rated for damp locations (UL listing) are recommended even in enclosed spaces.
Many homeowners integrate their enclosed decks into broader backyard design strategies, creating a seamless flow between indoor and outdoor entertaining zones. For more project ideas and material guidance, Fix This Build That offers detailed plans and tool recommendations for intermediate builders.
Conclusion
Enclosing a deck isn’t a one-size-fits-all project. The right approach depends on climate, budget, skill level, and how the space will actually be used. Screened enclosures suit warm-weather zones and pest control: glass systems deliver year-round comfort at a higher cost: three-season setups with removable panels offer flexibility without the full investment. Budget-conscious builders can achieve functional results with salvaged materials and basic carpentry, while those seeking a polished finish may opt for engineered systems and professional installation. Either way, the payoff is the same: more usable square footage and a space that earns its keep beyond three months a year.